# Unity Quick Start (SDK v3)
This guide will show you how to integrate the Frameplay plugin into your Unity project.
We officially support:
- Unity 2020.3 or higher
- Windows, OSX, iOS, Android, PS4, PS5 and Xbox One platforms
If you are upgrading from SDK version 2.x please follow our Upgrade Guide
# Prerequisites
Before getting started you must first have created a Game Developer Account (opens new window) and a Game (opens new window) on the Frameplay Platform.
# Getting started
# Download and Import the Frameplay Unity Plugin
To begin, download and import the Frameplay SDK.
- Download the latest version of the Frameplay plugin from the downloads page (opens new window)
- Open your project in the Unity editor.
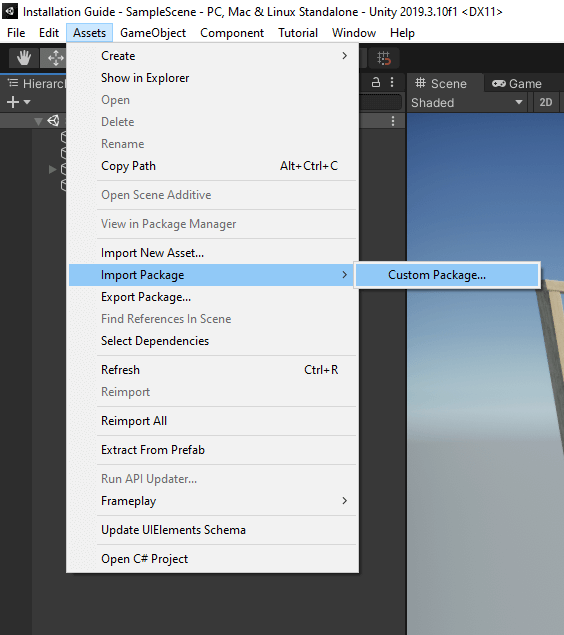
- Select Assets > Import Package > Custom Package and locate the FrameplayPlugin.unitypackage file you downloaded in step 1.
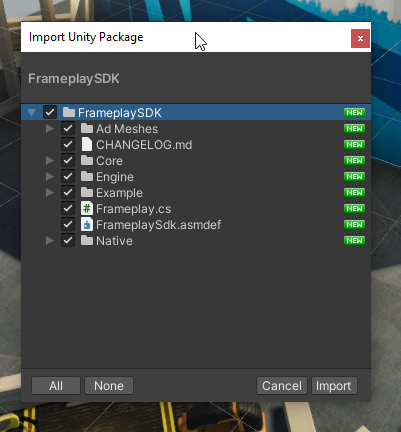
- Make sure all files are selected and click Import.
# Configure the Frameplay Developer Settings
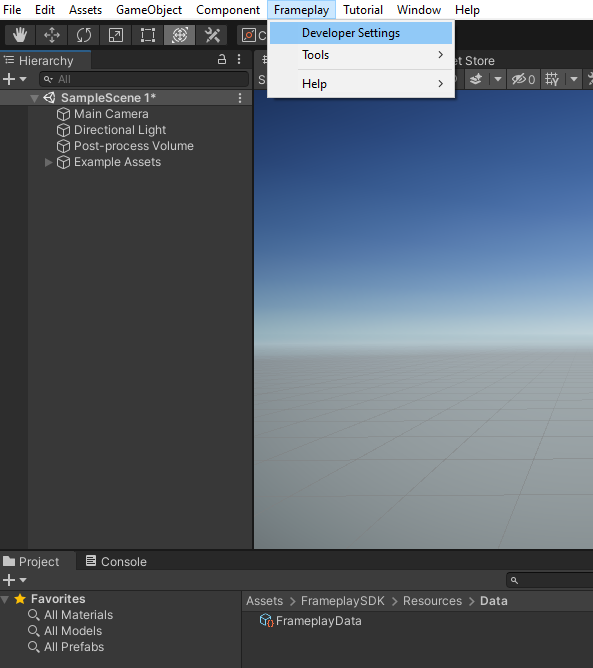
The Frameplay Developer Settings is a Scriptable Object that maintains the link between your Unity project and the Frameplay Developer Dashboard.
- Select the editor menu Frameplay > Developer Settings
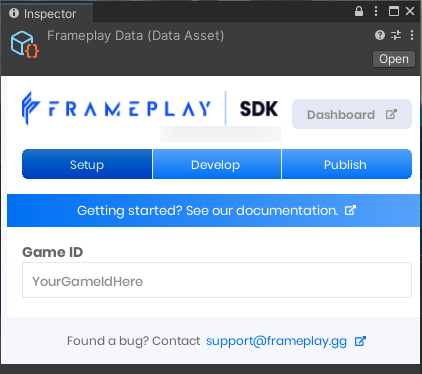
- In the Inspector Window set the Game ID to the value found on your Game Page (opens new window).
- Save the changes to the asset by selecting File > Save Project.
# Initialize the Frameplay SDK
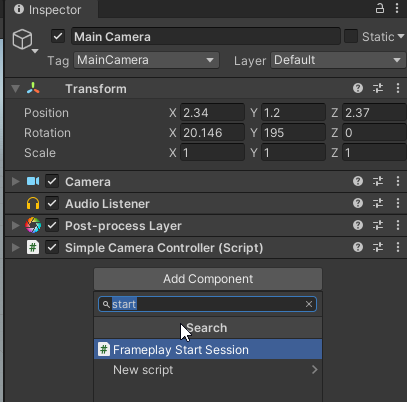
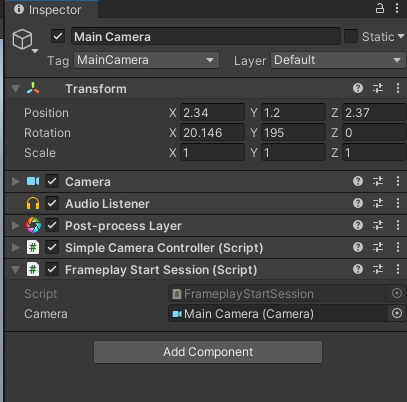
Loading ads at runtime requires a Frameplay Session and an In-Game Camera. We have provided an example script FrameplaySDK/Example/Scripts/FrameplayStartSession.cs that will initialize the SDK and register the in-game camera.
- Select an active Game Object in your Scene.
- Select Add Component in the Inspector Window and add the
FrameplayStartSession.csscript - Configure the player
AgeandGenderparameter with the current player details. (If available, these can be sourced from a custom login or client API) - (Optional) Add a reference to your Camera Object. If this parameter is left empty, the Main Camera in the Scene will be selected.
Read more about how to start a Frameplay Session using the API here
See the
# Create an Ad Space
Next create a Frameplay Ad Space and configure it to fit your game environment.
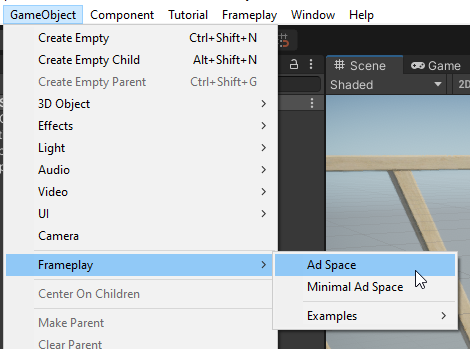
- Select GameObject > Frameplay > Ad Space to create a new Ad Space Game Object in the active scene.
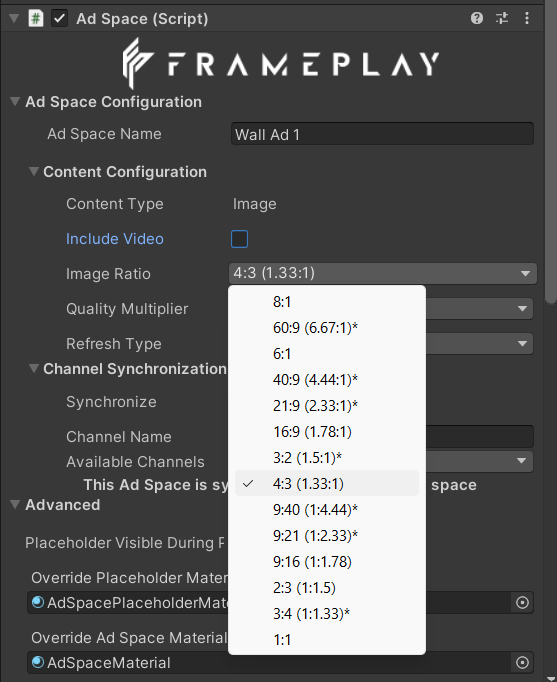
- In the Inspector Window, configure the
Ad Space Nameto a uniquely identifiable string. Be as descriptive as possible by including the Ad Space context or the Scene name where the Ad Space is rendered. - Select
Include Videoto enable both image and video content and maximize revenue - Set the
Ratioto one of our preset aspect ratios to best fit your environment.
- Move the Ad Space into it's desired Position and set the Rotation and Scale.
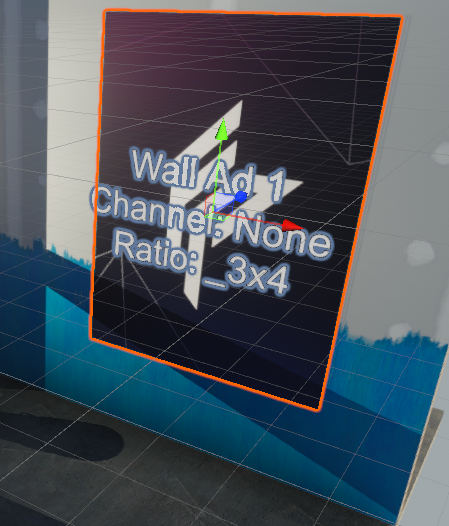
- Select your own
Placeholder Material. This material will be rendered if an advertisement has not yet loaded.
If your project uses a Scriptable Render Pipeline, you must configure your own Ad Space Materials. See our FAQ for more information.
# Load a Mock Advertisement
Select Play in Editor. This will trigger the Frameplay Session to start and your Ad Space will request, download and display a mock advertisement.
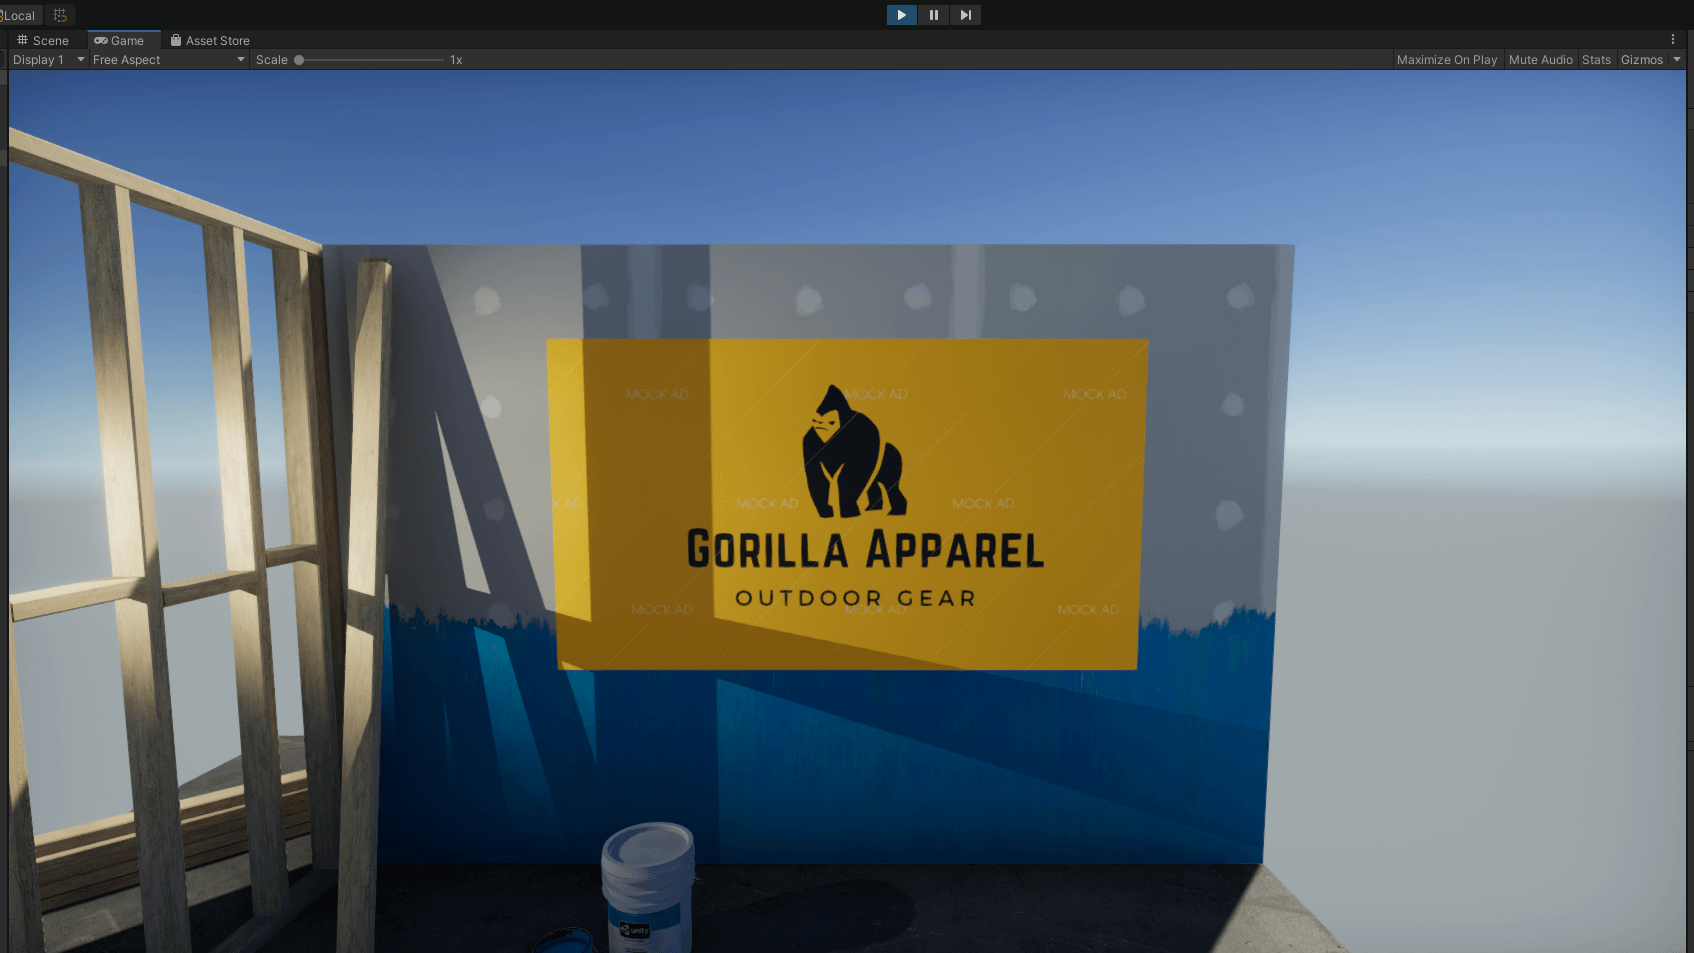
Congratulations! You have created your first intrinsic advertisement.
# View Impression Data
Sessions started in-editor and in development builds will automatically run in Test Mode and mock advertisements will be used.
Impression data gathered in Test Mode will display on your games Test Dashboard (opens new window) and will not generate revenue.
# Publishing Builds
# User Permissions
Frameplay utilizes the device advertising ID serve more relevant advertisements to the player.
# Android
To request access the advertising ID on Android devices, you must declare the AD_ID permission in the AndroidManifest file:
<uses-permission android:name="com.google.android.gms.permission.AD_ID"/>
Read more about Google's Advertising ID (opens new window) policy.
# iOS
To request access to the advertising ID on iOS devices (ios 14+), you must implement the AppTrackingTransparency (ATT) framework.
The FrameplaySDK/Engine/Editor/XcodePostProcess.cs script contains an example build hook that creates a NSUserTrackingUsageDescription and adds it to the info.plist file when exporting your project.
Read Unity's full ATT guide here (opens new window), and more information on Apple's User Privacy and Data Use (opens new window).
# Build
To create a final build select File > Build Settings, confirm Development Build is not toggled, and select Build.
See the
# Monetization
To monetize your final build, you must submit your account and game for approval on the Frameplay Platform:
- Submit Developer Account for approval (opens new window)
- Submit Game for approval (opens new window)
Please allow 48 hours for approval. Advertisements will not load in Production builds until both your account and game is approved. At this time our integration team will contact you and notify once approved.
# Player Consent
Some regions may require user consent before Frameplay can serve advertisements. For example, a user within the EEA requires consent under General Data Protection Regulation (GDPR). Games monetizing with Frameplay advertisements in this region must integrate a compliant Consent Management Platform (CMP) to collect consent from the user.
Typically when a user does not consent to, or opts out of data collection and processing under a privacy regulation (for example GDPR, CCPA, or PIPL), this will limit the data available about your users and will likely impact your revenue.
For more more information see IAB Europe TCF (opens new window) and the iAB's approved list of CMPs (opens new window).
# Troubleshooting
If something went wrong during setup, check the Console Window for warnings (Ctrl+Shift+C on Windows, or Shift+Command+C for Mac) or visit our FAQ page.
